Welcome to “Making MemeMe” where I chronicle my adventures and discoveries in creating the second portfolio app in Udacity’s iOS Developer Nanodegree.
Even though I know next to nothing about graphic design, I still want the apps I make to look good. Today I discovered lots of fun things about toolbars in iOS that’s going to help my MemeMe app look awesome.
First, let’s start of with what a toolbar is. Toolbars are, well, bars located at the bottom of the screen. They’re populated with buttons that perform different actions. A good example of this is in the App Store app. The buttons along the bottom allow you to view featured apps, top-rated apps, popular apps nearby, purchased apps, and updates to the apps installed on your device.

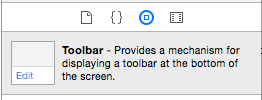
Essentially, they provide a way to add multiple buttons to an app without the need to set a million constraints. And adding a toolbar to your app is actually quite simple: simply drag a Toolbar object in from the Object Library. By default the toolbar is populated with one button.
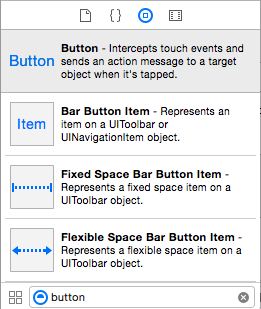
We’ve now reached the point where I started asking questions. After all, I knew I’d want at least three buttons for the MemeMe app: load image from gallery, take a photo, and add text. I wasn’t sure how to add a button, so I figured I’d just try dragging a new button to the toolbar. But when I searched “button” I found there were more options available than I thought: “Bar Button Item,” “Fixed Space Bar Button Item,” and “Flexible Space Bar Button Item.”
Bar Button Item seemed to be the way to go, so I dragged one onto the toolbar, and…dangnabbit! It appeared right next to the other button. I mean, I guess that’s what it was supposed to do, but I couldn’t seem to move or set constraints for the button themselves, and I certainly didn’t want all of my buttons huddled in the corner.

I found I could set the distance for each button item from the left or right edge of the screen, but I knew that wouldn’t scale for multiple devices. I then did what any good n00b does in such a situation, and just started randomly clicking things. It was during this exploration that I discovered you could change a button’s appearace using the “Identifier” field of the Attributes Inspector. As a bonus, there are a bunch of icons to chose from. I turned one button to a folder and the other to a camera felt better about myself…or at least a bit closer to my goal.

Then, on a whim, I dragged the “Flexible Space Bar Button Item” between the two icons, and voilà! One icon in the left corner and one icon in the right corner. Great success! Seems that this item spaces buttons out evenly between the right and left sides of the screen. I added another Button Item and Flexible Space Bar Button Item to test the hypothesis, and lo and behold, three equally spaced buttons that scale for different screen sizes!
 So, to summarize my discoveries:
- Toolbars appear at the bottom of your app screen
- You can add multiple Bar Button Items to perform multiple actions (and add target-actions just like you would with normal buttons)
- You can position these buttons to be equally spaced from one another using a Flexible Space Bar Button Item
- Alternatively, you can position these buttons to be spaced a certain distance from once another using a Fixed Space Bar Button Item
Be First to Comment